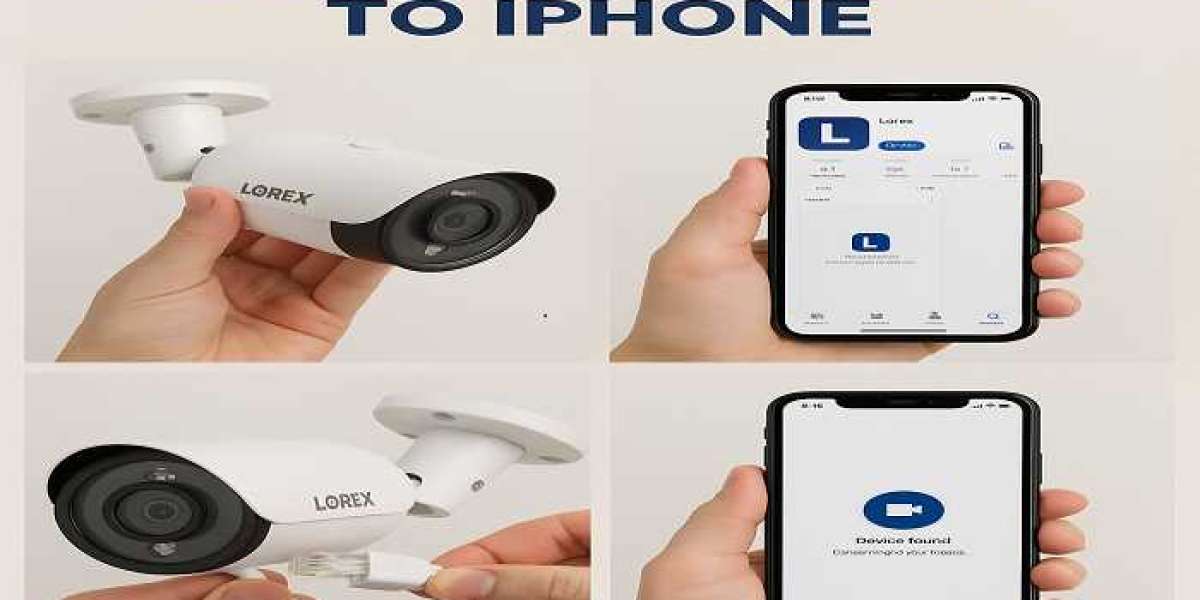
One of the first things you should do after installing a Lorex security camera system is to connect it to your iPhone so you can watch and get alerts remotely. If you adhere to the official setup instructions, the procedure is quite simple. This is a detailed guide that will show you how to connect Lorex camera to iPhone in a matter of minutes.
- Get the Lorex app.
Depending on the model of your camera or DVR/NVR, Lorex offers a variety of mobile apps. "Lorex Home," which is free to download from the App Store, is the most often utilized app. Look for "Lorex Home" on your iPhone and download it.
- Create an account on Lorex or sign in.
If you don't already have an account, use the Lorex Home app and create one. Just enter your login information to access your Lorex account if you already have one.
- Include Your Device
Tap the "+" or "Add Device" icon after logging in. The QR code, which is often found on the camera or the box's quick start instructions, will need to be scanned. To have your iPhone recognize it automatically, aim its camera at the QR code.
- Establish a Wi-Fi connection
To link your Lorex camera to your Wi-Fi network, adhere to the on-screen directions. Because many Lorex devices do not support 5GHz, make sure your iPhone is linked to the same 2.4GHz Wi-Fi network. When prompted, enter your Wi-Fi password.
- Complete the setup
The camera will instantly sync with your Lorex account as soon as it is connected to Wi-Fi. Now, you can record video clips straight from your iPhone, view the live feed, and even set motion detection alerts.
Tip: To receive real-time alerts when your Lorex camera detects movement, make sure that push notifications are enabled in your iPhone settings.
For further details visit our webpage.